Using your PhonePe UPI App
If you have been following my earlier posts, you'd be familiar with UPI and PhonePe (if not, go here and here). In this post, I'll be talking about how PhonePe (or any other UPI app) works and my experience setting the app up and transacting on it.
The basic process of how you go about using a UPI app is shown in the following diagram.
Step 1 : App installation
Download and install PhonePe from here. This app is not available on the Apple store yet.
In case you have an iphone you can use any other UPI app like pockets. pockets has some really cool offers and is my backup UPI app.
You can use the UPI app from any app, irrespective of which bank your account is in.
Step 2 : Verify your mobile number
Make sure you are using the mobile number which is registered with the bank. You'll receive an OTP to validate your number and set a pin for accessing PhonePe..
The mobile phone identifies your account in a given bank and is therefore crucial to the UPI setup process.
Step 3 : Select your VPA (Virtual Payment Address)
Next you get to select your VPA or virtual id which looks like an email id. In PhonePe you'll get a virtual id of the form name@ybl.
Mine is sagaranjos@ybl. If you have to send money to someone totest your UPI app, you can send money to this id. :)
ybl is short for Yes Bank Limited, who are the banking partners for PhonePe. Yes Bank comes into the picture, since PhonePe is flipkart owned and does not have a banking backend.
Step 4 : Link bank account
Now we come to the final part which is the linking of the bank acocunts.
From the menu, select 'Bank Accounts' and click the 'Add New Bank Account' button.
You'll get a list of banks which are UPI enabled. The list covers most banks and if your bank isn't in the list, you may have to wait for it to become available before you can start using UPI. (paytm wins here, since they don't have any such restriction)
Select your bank and the app automatically picks up the account on the basis of the mobile number. This is where the mobile number plays a very important part. If you don't have the mobile number registered with your bank account for mobile banking, then you would not be able to get the bank linked.
 |
| The 'Add Account' screen |
 |
| The list of banks |
Step 5 : Set MPIN for your bank account
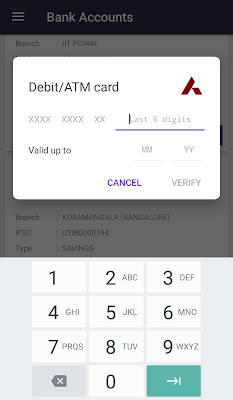
After linking your bank account, you would need to provide a 4 or 6 digit MPIN for your bank account. If you already have your account's MPIN, you can enter the same or change/reset it if required.
In case you need to set the MPIN, you would need to provide the last 6 digits of the debit/ATM card number and the expiry date of the card.
Maestro cards don't have expiry dates and cannot be used for this purpose.
Step 6 : Start Transacting
Once this is done, your bank account is linked to your UPI id.
You can now go ahead and transfer money to your friends, split bills with friends, recharge mobiles or pay bills for various utlility services like electricity, gas, DTH, broadband etc.
Transfers happen instantaneously and direct to your bank account. So unlike paytm, there is no charge to transfer money to your bank account.
You can also link multiple bank accounts to the same UPI id. In my case, I have linked 4 bank accounts to my UPA id : sagaranjos@ybl.
So if I am getting money from someone and I want it to go to my ICICI bank instead of the Axis bank, I'll just make ICICI my default bank account in PhonePe. I can keep changing the default bank account as per my requirements and the change happens on-the-fly.
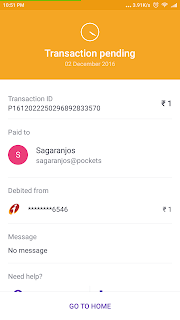
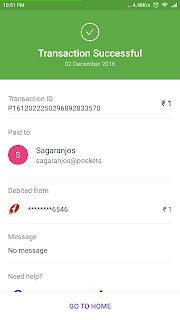
Transaction Screen
Money Transfer


Every time you are sending money to someone or paying a bill, the app asks you which account to debit money from. This is a distinct advantage as compared to other UPI apps, which generally allow only one bank account per UPI id (at least till now). You can also create multiple VPAs, if you want.
QR codes can be generated and scanned as well.
I have tried money transfers as well as mobile recharges and they work like a charm.
Check out the app and do let me know how your experience was. More than happy to take questions too!


Leave a Comment